Are you seeing streaks or missing lines in your DTF prints? It's a common problem, and a simple wipe might be the answer. Let's get your printer back to perfect prints!
Wiping the print head surface of your DTF printer is a simple daily task that can prevent ink clogs and ensure consistent, high-quality prints. Gently use a lint-free cloth or a specialized cleaning swab to remove any dried ink or residue from the nozzle plate.
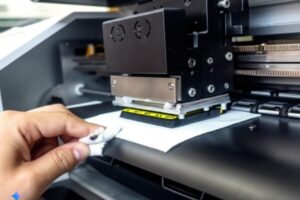
Want to know more about keeping your DTF printer head in top shape? It's not as hard as you might think. Keep reading and I'll show you how to easily maintain your print head for the best results.
How to clean DTF print head?
Having trouble getting clean prints from your DTF printer? A dirty print head could be the issue. Let's figure out how to clean it properly.
To clean a DTF print head, first turn off your printer and gently access the print head. Use a lint-free cloth dampened with cleaning solution or distilled water to carefully wipe the nozzle plate. Avoid touching the nozzles directly and ensure the print head is completely dry before turning the printer back on.
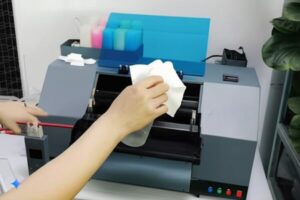
But just wiping might not be enough sometimes. Let's really dive into the details of cleaning a DTF print head so you can avoid bigger problems later on.
Step-by-Step DTF Print Head Cleaning Guide
Cleaning a DTF print head is important for keeping your printer working well. If you don't clean it, you might get poor print quality or even damage your printer. Here’s a simple guide to help you:
- Turn off the printer: Always start by turning off your DTF printer and unplugging it. This is for your safety and to prevent any damage to the printer.
- Access the print head: Open the printer cover to access the print head. The way to access it can be different depending on your printer model, so check your printer manual if you are not sure. Usually, you might need to move the print head carriage to the center to get easy access.
- Prepare cleaning supplies: Get a lint-free cloth or cleaning swabs. You can also use a print head cleaning solution or distilled water. Don't use tap water because it can have minerals that can clog the nozzles.
- Gentle wiping: Dampen your cloth or swab with the cleaning solution or distilled water. It should be damp, not dripping wet. Carefully wipe the surface of the print head nozzle plate. Be very gentle and avoid pressing hard or scratching the surface. The nozzles are very delicate.
- Remove dried ink: If you see dried ink, gently try to dissolve it with the damp cloth or swab. You might need to wipe a few times. For stubborn ink, you can let a slightly damp cloth sit on the nozzle plate for a minute to soften the ink before wiping.
- Drying: After cleaning, let the print head air dry completely before you turn the printer back on. You can also use a dry, lint-free cloth to gently pat it dry. Make sure there is no moisture left.
- Test print: Once everything is dry, close the printer cover, plug the printer back in, and turn it on. Do a test print to check if the print quality has improved. If it's still not good, you might need to repeat the cleaning process or consider more advanced cleaning methods.
By following these steps regularly, you can keep your DTF print head clean and working perfectly, ensuring great prints every time. Remember, gentle and regular cleaning is key to a long-lasting and efficient DTF printer.
How do you clean a direct thermal print head?
Is your direct thermal printer not printing clearly? Cleaning the print head could be the fix. Let's learn how to do it right.
To clean a direct thermal print head, turn off the printer and open the access cover. Use a cleaning card or a lint-free cloth lightly dampened with isopropyl alcohol to gently wipe across the print head elements. Allow it to dry completely before closing the cover and resuming printing.
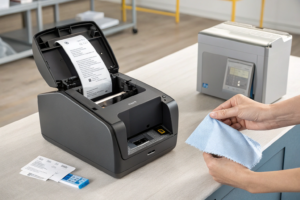
Direct thermal printers are a bit different than DTF printers, but cleaning the head is still important. Let’s understand more about keeping these print heads clean for the best performance.
Maintaining Your Direct Thermal Print Head
Direct thermal printers use heat to create images on special paper. Because of this, the print head can get dirty with paper dust and residue. Regular cleaning is important to keep print quality good and extend the life of the print head. Here’s how to maintain your direct thermal print head:
- Regular Cleaning Schedule: How often you need to clean depends on how much you use your printer. For regular use, cleaning it once a week is a good idea. If you use it a lot, you might need to clean it more often, like every few days or even daily.
- Use Cleaning Supplies Made for Printers: You can buy special cleaning cards or pens made for thermal print heads. These are designed to clean without damaging the delicate parts. If you don't have these, you can use a lint-free cloth and isopropyl alcohol. Make sure the alcohol is not too strong – 70% to 90% isopropyl alcohol is usually recommended.
- Cleaning Steps:
- Turn off and unplug: Always turn off the printer and unplug it before cleaning.
- Open the printer: Open the printer cover to access the print head.
- Use a cleaning card: If you're using a cleaning card, follow the instructions that come with it. Usually, you just swipe the card across the print head a few times.
- Use a cloth and alcohol: If you're using a cloth and alcohol, lightly dampen the cloth with isopropyl alcohol. Gently wipe across the print head elements in one direction. Don't scrub hard.
- Let it dry: Let the print head air dry completely before you close the cover and start printing again. Alcohol evaporates quickly, but make sure it’s fully dry to avoid any issues.
- Avoid Damage: Be very gentle when cleaning. The print head elements are delicate and can be easily damaged. Don’t use anything sharp or abrasive. Also, don't use too much liquid, as it could seep into the printer and cause damage.
- Proper Paper Storage: Store your thermal paper in a clean, dry place. This helps to reduce paper dust and keeps the print head cleaner for longer.
By following these tips, you can keep your direct thermal print head clean and working well. This will give you clear, readable prints and help your printer last longer. Taking a few minutes for regular cleaning can save you from problems and keep your printer running smoothly.
How do I clear the head of my Epson printer?
Is your Epson printer giving you trouble with blurry or incomplete prints? A clogged print head might be the culprit. Let's see how to clear it.
To clear the head of your Epson printer, run the printer's built-in print head cleaning utility. Access this through your printer's control panel or the printer settings on your computer. If the initial cleaning doesn't work, you may need to run a more intensive cleaning cycle or manually clean the print head if the problem persists.
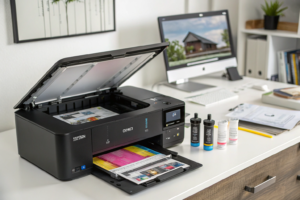
Epson printers, like many inkjet printers, can sometimes have print head issues. Let's explore the best ways to clear a clogged print head on your Epson printer to get back to printing perfectly.
Using Epson Printer Utilities for Head Cleaning
Epson printers come with built-in tools to help you maintain them, including print head cleaning utilities. These are usually the first and easiest steps to take when you notice print quality problems. Here’s how to use them:
- Accessing the Cleaning Utility: There are two main ways to access the print head cleaning utility on your Epson printer:
- Through the Printer Control Panel: Many Epson printers have a screen and buttons on the printer itself. Look for options like "Setup," "Maintenance," or "Utilities" in the menu. Then, find the "Print Head Cleaning" option. The exact steps can be different depending on your printer model, so check your printer manual if needed.
- Through Your Computer: You can also access the cleaning utility from your computer. For Windows, go to "Control Panel" > "Devices and Printers," right-click on your Epson printer, and choose "Printing Preferences" or "Printer Properties." Then, look for a tab like "Maintenance" or "Utility" where you’ll find the "Print Head Cleaning" option. For Mac, go to "System Preferences" > "Printers & Scanners," select your Epson printer, click "Options & Supplies," then "Utility," and you should see "Print Head Cleaning."
- Running the Cleaning Cycle: Once you find the "Print Head Cleaning" option, select it and follow the on-screen instructions. The printer will start a cleaning cycle, which uses ink to try to clear any clogs in the print head nozzles. This process can take a few minutes, and the printer might make some noise.
- Check Print Quality After Cleaning: After the cleaning cycle is done, print a nozzle check pattern. This is usually an option in the printer utility menu as well. The nozzle check pattern will show you if all the nozzles are printing correctly. If there are still gaps or missing lines in the pattern, you might need to run the cleaning cycle again.
- Intensive Cleaning: If one or two cleaning cycles don’t fix the problem, the printer utility might have an option for a more "intensive" or "powerful" cleaning. This uses more ink and takes longer, but it can be more effective for stubborn clogs. Be careful not to run intensive cleaning too often, as it uses a lot of ink.
- When to Consider Manual Cleaning: If you’ve tried the cleaning utilities several times and the print quality is still poor, or if you don’t want to waste more ink on cleaning cycles, you might need to consider manual cleaning. Manual cleaning involves physically accessing the print head and cleaning it, which is a more advanced step and should be done carefully.
Using the built-in cleaning utilities is usually the best first step for clearing a clogged Epson print head. It’s easy to do and can often solve the problem without needing more complicated methods. Remember to check your printer manual for specific instructions for your model.
How do I clean the printhead on my printer?
Wondering how to clean the printhead of your printer in general? It's a common maintenance task for many printers. Let's learn the basics.
To clean the printhead on your printer, first identify your printer type (inkjet or laser). For inkjet printers, use the printer's cleaning utility or manually clean with a damp lint-free cloth. For laser printers, gently wipe the printhead area with a dry, lint-free cloth. Always refer to your printer's manual for specific instructions.
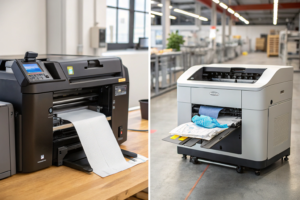
Cleaning the printhead is a key part of printer maintenance, no matter what type of printer you have. Let's get a broader understanding of how to clean printheads on different kinds of printers.
General Guide to Cleaning Printer Printheads
Cleaning the printhead can help fix common printing problems like streaks, faded prints, or missing colors. The method you use depends on the type of printer you have – mainly inkjet or laser.
For Inkjet Printers:
Inkjet printers use liquid ink that can dry out and clog the print nozzles. Cleaning the printhead is a common maintenance task.
- Use the Printer's Cleaning Utility: Most inkjet printers have a built-in print head cleaning utility. This is usually the easiest and safest way to start. You can access it through the printer's control panel or through your computer's printer settings. Follow the prompts to run the cleaning cycle.
- Manual Cleaning (If Utility Doesn't Work): If the cleaning utility doesn't solve the problem, you might need to manually clean the print head.
- Turn off and unplug: Always turn off and unplug the printer first.
- Access the print head: Open the printer and wait for the print head carriage to move to the center (if it does). If it doesn't move automatically, check your printer manual for how to access it.
- Prepare cleaning supplies: You'll need lint-free cloths or swabs, and distilled water or a print head cleaning solution.
- Gentle wiping: Dampen a cloth or swab with the cleaning solution or distilled water. Gently wipe the nozzle plate of the print head to remove any dried ink. Be very careful not to scratch the nozzles.
- Soaking (For Stubborn Clogs): For stubborn clogs, you can try gently soaking the nozzle plate with a little cleaning solution for a few minutes before wiping.
- Drying: Let the print head air dry completely before putting everything back and turning the printer on.
For Laser Printers:
Laser printers use toner powder instead of liquid ink. Print head cleaning is less frequent than with inkjet printers, but still important. In laser printers, what you might think of as the "print head" is often referred to as the imaging drum or the laser scanning unit. Cleaning usually involves removing toner dust and debris.
- Consult Your Printer Manual: Laser printer cleaning steps can vary a lot by model. Always check your printer manual for specific instructions.
- General Steps (May Vary):
- Turn off and unplug: Turn off and unplug the printer.
- Access the print head area: Open the printer to access the area where the imaging drum or laser unit is located. This might involve removing toner cartridges.
- Dry Cleaning: Use a dry, lint-free cloth or a soft brush to gently remove any toner dust or paper debris from the accessible parts of the print head area. Sometimes, you can use compressed air to blow away dust, but be careful not to blow toner dust into the air where you can breathe it in.
- Avoid Liquids: Generally, you should avoid using liquids to clean laser printer components unless specifically recommended by your printer manual for a particular part. Moisture can damage some laser printer parts.
- Reassemble: After cleaning, carefully reassemble any parts you removed, like toner cartridges, and close the printer.
Important Tips for All Printer Types:
- Be Gentle: Print heads are delicate. Always be gentle when cleaning to avoid damage.
- Use Lint-Free Materials: Use lint-free cloths or swabs to avoid leaving fibers behind.
- Refer to Your Manual: Your printer manual is the best source for specific cleaning instructions for your printer model.
- Regular Maintenance: Regular light cleaning is better than waiting for problems to develop.
By understanding the basics of print head cleaning for both inkjet and laser printers, and by following the specific instructions for your printer model, you can keep your printer working well and producing good quality prints.
Conclusion
Keeping your DTF printer head clean is key for great prints. Regular, gentle wiping and cleaning will prevent clogs and keep your printer running smoothly, saving you time and frustration.


One Response